
Do you like making your life harder than it needs to be? Do you like having your art or craft projects take more time? Then why don't you start hand quilting more??
Oh goodness, I jest. If you've followed along my quilting journey for awhile, you have definitely noticed that I hand quilt many of my quilts. I don't love machine quilting and I don't love sending a quilt to be longarmed because then I feel like I've given my project away for someone else to finish it and hasn't been 100% made by me. And, I love hand quilting!
Hand quilting adds a beautiful texture to quilted projects. And, since the stitches aren't as tight as they would be when made with a machine, there is a beautiful drape that comes with a hand quilted project. However, this blog wasn't meant to sell you on hand quilting, but to talk about taking it a step further!
Recently, I completed a Christmas quilt - the Retro Ornaments quilt by Lo & Behold Stitchery:
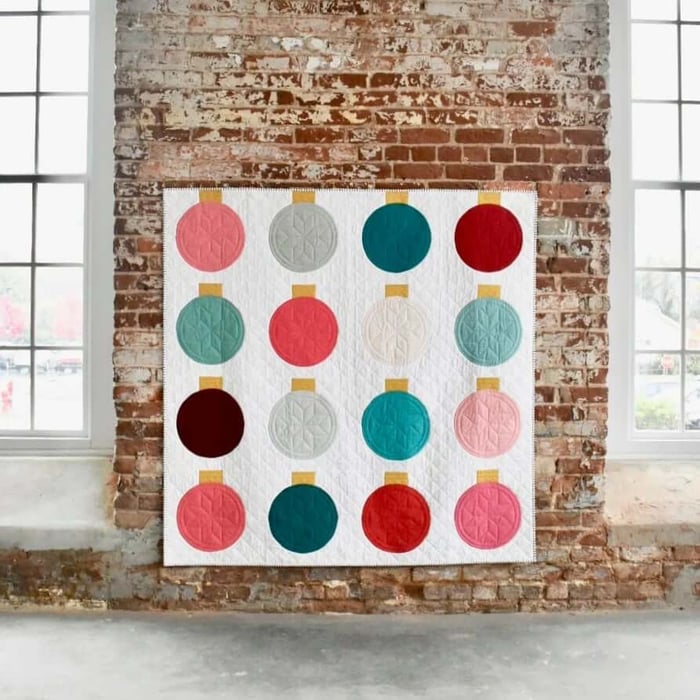 This one was made and photographed by Lo & Behold Stitchery.
I knew I wanted to hand quilt it, but none of my usual straight line quilting ideas felt right. What I really wanted was a fun Christmas quilting pattern - something like a longarmer might do, but without sending it to a longarmer.
I decided to experiment with tracing out my own Christmas quilting pattern on the quilt. I freehand drew several wavy lines horizontally across the quilt. I quilted those lines and little rectangles for the base of holiday lights in a bright green, and then used a cardboard template to trace bulbs every four inches along the green line. I alternated between four bright colours: pink, yellow, orange, and blue.
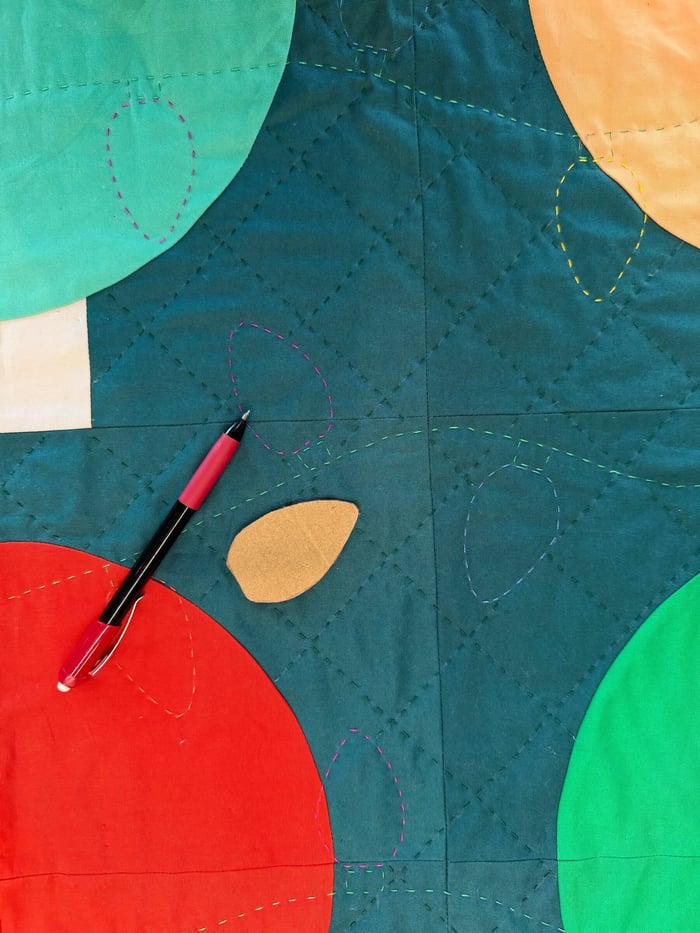
Once the strings of Christmas lights ran across the quilt, it still felt a bit empty, like it needed more quilting. So, I went back in with my long quilting ruler, and traced a 2" horizontal grid across the background, making sure not to cross over the lights or the ornaments. I wanted the grid to look like it was part of the background, so I colour matched the thread to the background fabric.
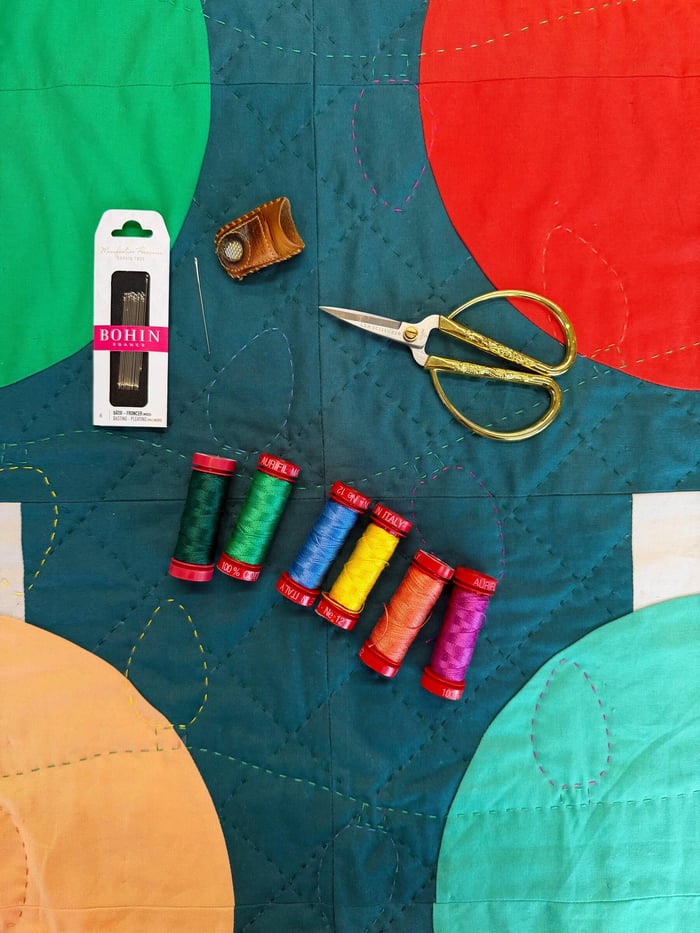
Here are the tools I use when handquiltng: a leather thimble (here is my current favourite thimble), a good pair of snips (like these ones from LDH, I like the 5"), Bohin Straw Milliner needles in size 6 (strong, sharp, long), and Aurifil 12wt thread.
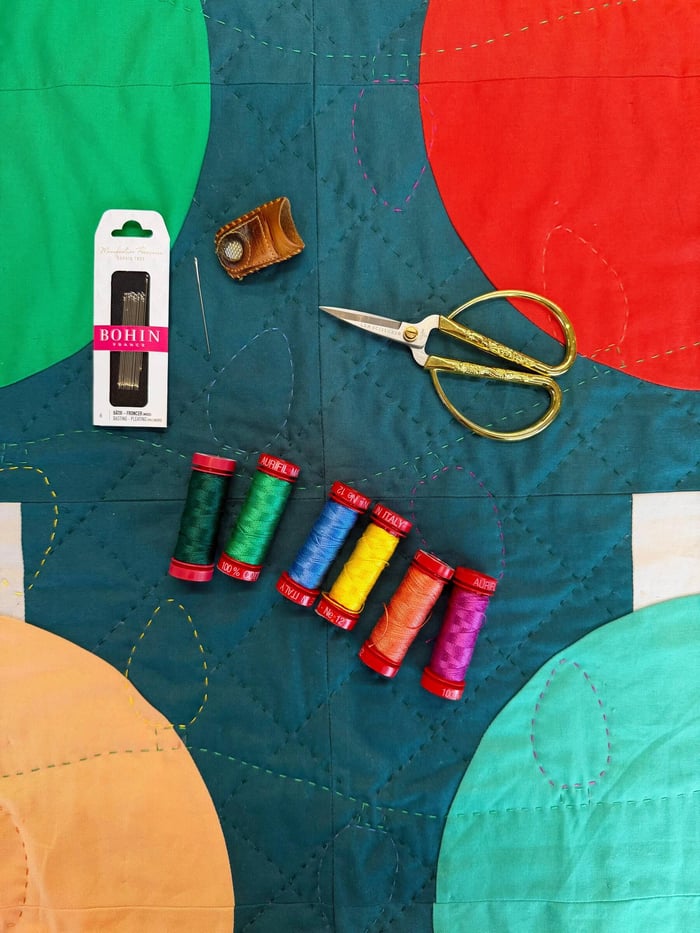
Isn't it great!? It turned out exactly as I had hoped, except that I wish I had used a brighter blue. I'm not showing you the complete quilt yet, because this Retro Ornaments quilt is November's Quilt of the Month, so you have to wait for the BIG REVEAL (and for a 20% discount on the quilt kits and pattern).
I will be trying other "longarm-esque" patterns in the future!
But this isn't the only way to use decorative hand quilting. Take this Half Light Quilt for example; first, a photo of the full quilt:
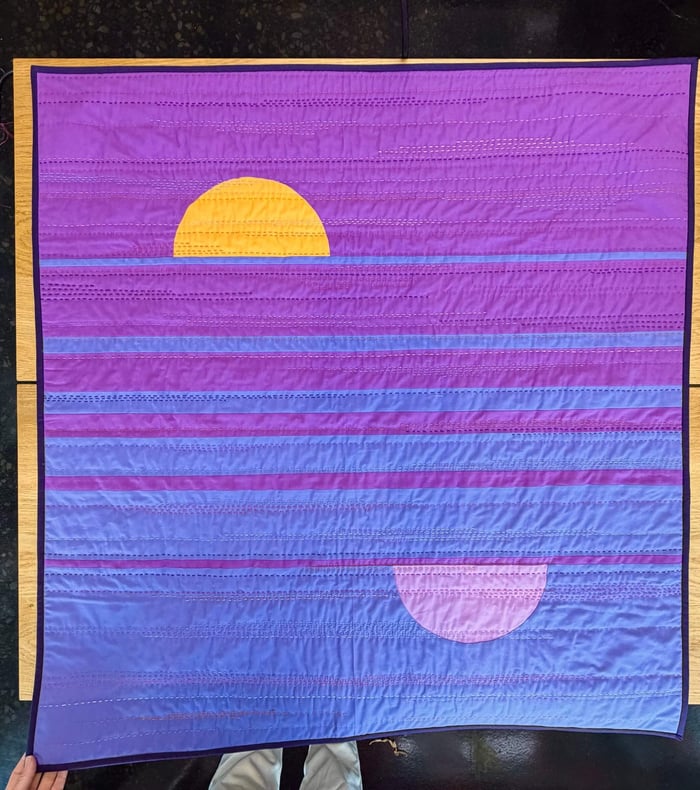
Joselyn (who made the quilt) used "just" straight line quilting, but the effect is anything but basic. I believe she used 7 or 8 colours and added whole and partial horizontal lines to suggest the light that brightens the sky at sunrise and sunset. Here are two detail photos:
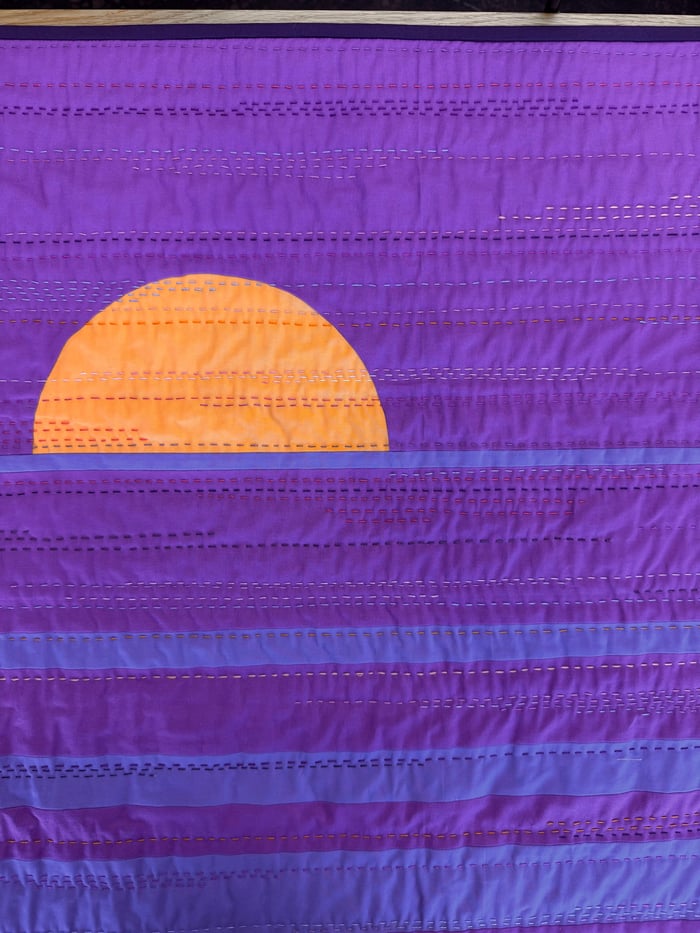
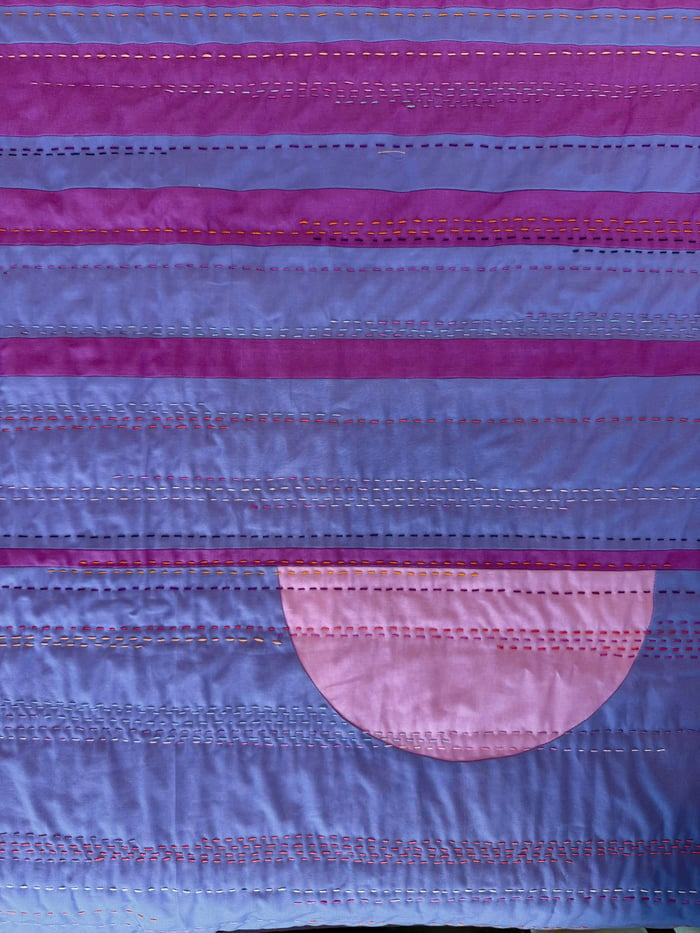
Isn't that effect stunning? It adds such movement to the quilt, giving it dimension and beauty. This was also done with Aurifil 12wt thread.
Oh, and if you are reading this blog in September 2026, this Half Light Quilt kit and pattern are 20% off until the end of the month! Click HERE.
Now let me show you something I did that almost took away my desire to ever hand quilt again. You've heard of matchstick quilting, right? Where many lines of straight line machine quilting are sewn across a quilt, only a matchstick's width apart? Well what about if that was done with hand quilting.....
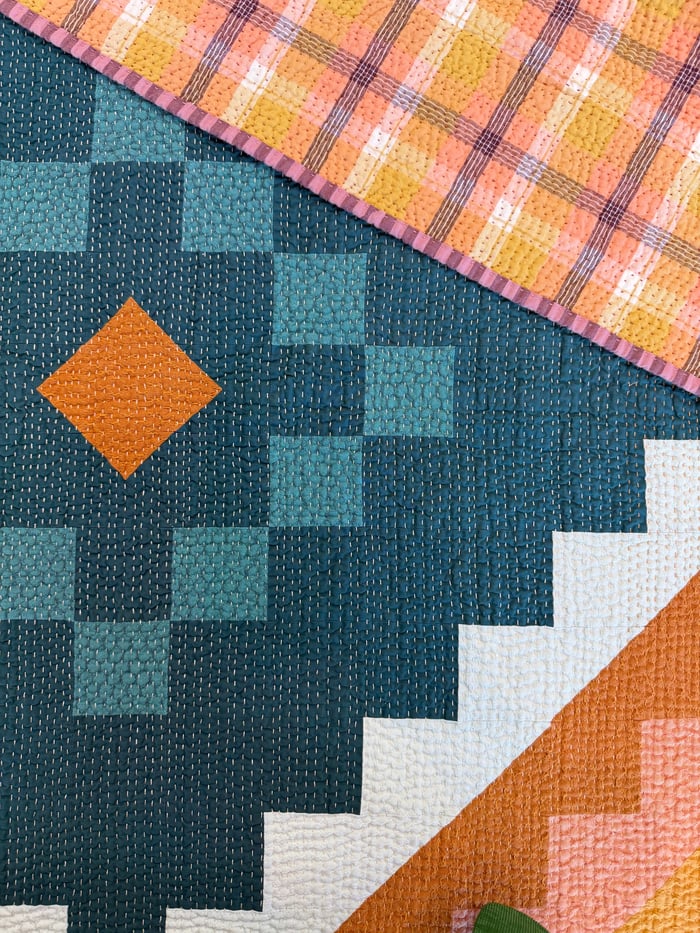
I did this. And it took me f.o.r.e.v.e.r. I really questioned whether I would ever finish it! This is the Courage Dear Heart pattern by Tessellate Textiles, and it reminds me of a handwoven rug. I wanted the quilting to resemble the warp strings that would be the base for a handwoven rug and to add texture so it felt more like one textile instead of the three layers of a quilt.
The problem?? I succeeded on both counts. And it is such a wonderful finished project that I will absolutely tackle this quilting style again someday! The quilt top is made with mostly Fableism wovens, and also also backed with a Fableism woven. Here, let me show you a photo of the full quilt so you can visualize it all.
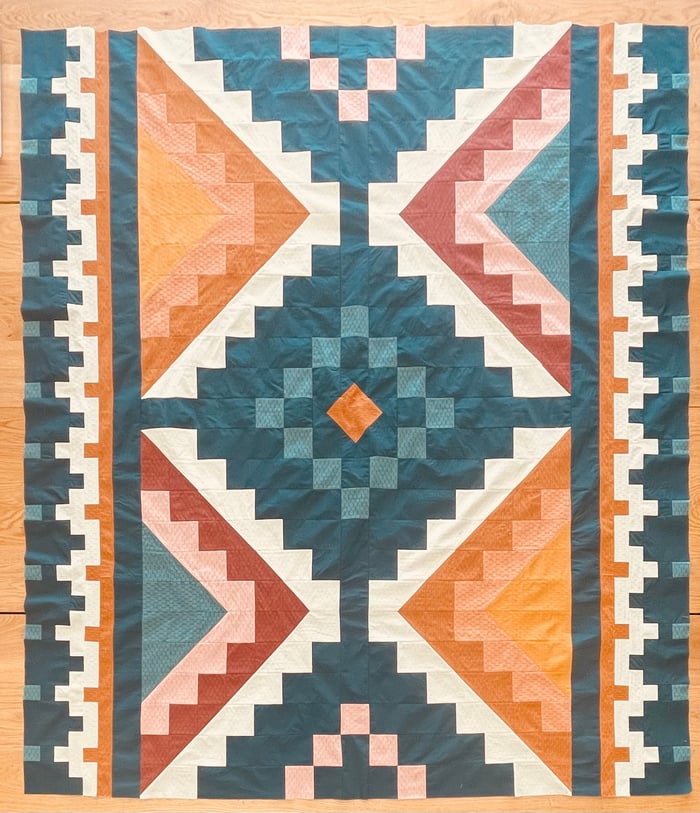
The finished quilt's texture can be best described as... squishy? That doesn't sound as wonderful as I want it to. Maybe lux? lush? plush? One of those. You'd think that a quilt with that much quilting might get stiff, but the combination of the looser weave fabric, the hand quilting, and I must have used Bamboo batting, makes this quilt one of the drapiest, squishiest, most lovely quilts I've ever made.
Perhaps straight line quilting doesn't feel like it should be called decorative to you. But when it adds this much to a quilts look and feel, I think it must!
Let's continue on with straight line quilting and see if you think this qualifies as decorative:
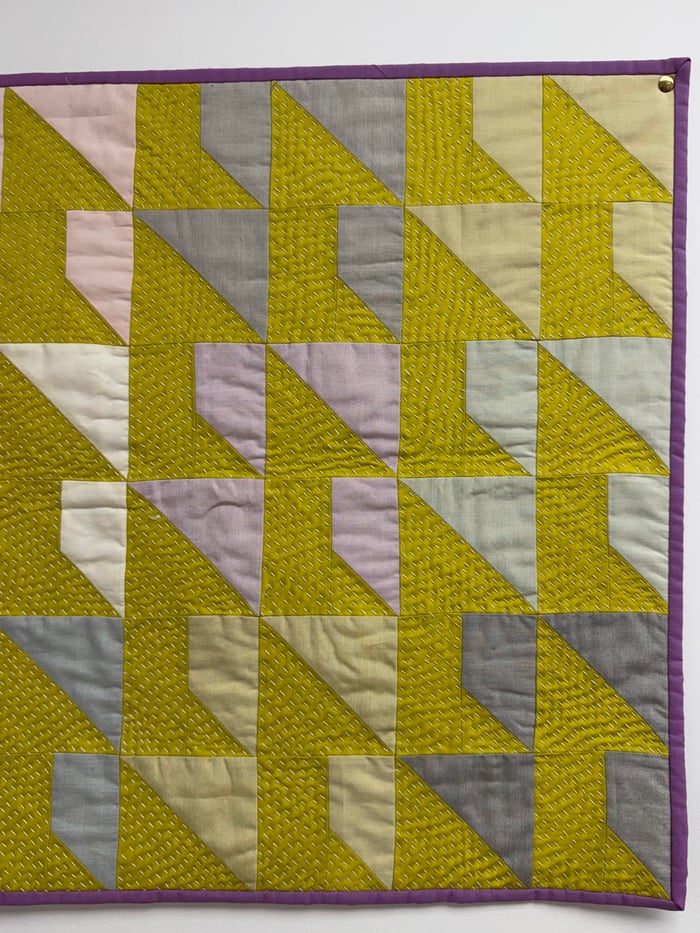
This is the Rockwood Quilt, a pattern by The Blanket Statement, that I miniaturized to about 1/4 of the Baby size that is listed on her pattern (I went through a phase where I miniaturized every single quilt I made into a wall hanging-ish size). I don't remember why I felt like it needed extra texture; the finished quilt top probably felt too flat and a bit boring; so in I roll with my Aurifil 12wt thread and a hefty amount of time. This quilt now hangs on my office wall. :)
Okay, I feel like I've gone from exciting to boring with possible Decorative Hand Quilting options, and this next one might continue that trend.
Here is a scrappy checkerboard quilt that I made a few years ago, and then took it on a big road trip to quilt while we drove. It rode all down the US west coast with me, and I have so many fond memories tied to this quilt!
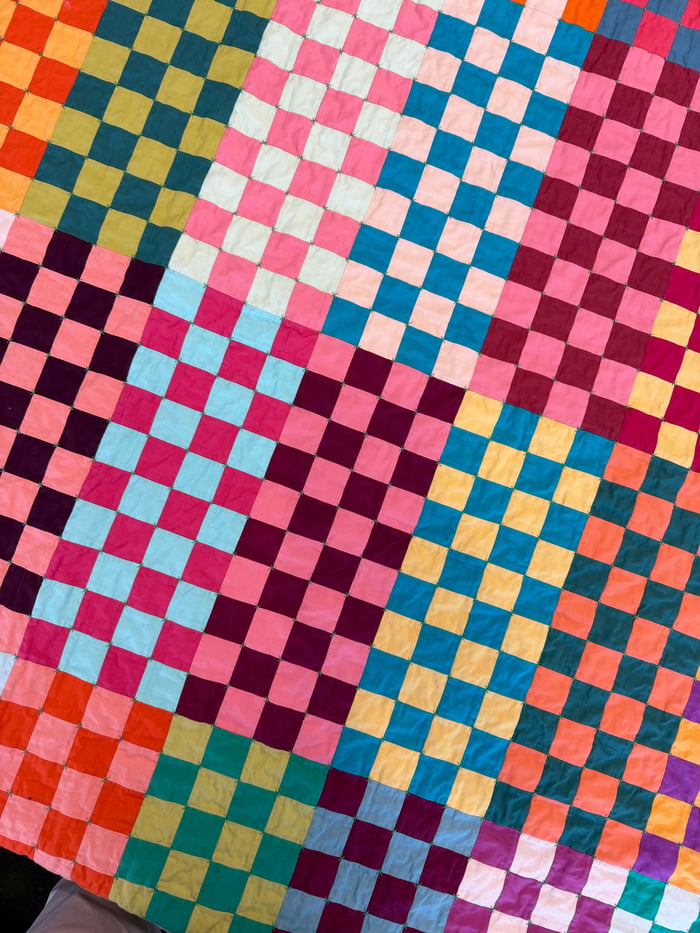
Can you see the little x's in each corner? Here, let me make it easier:
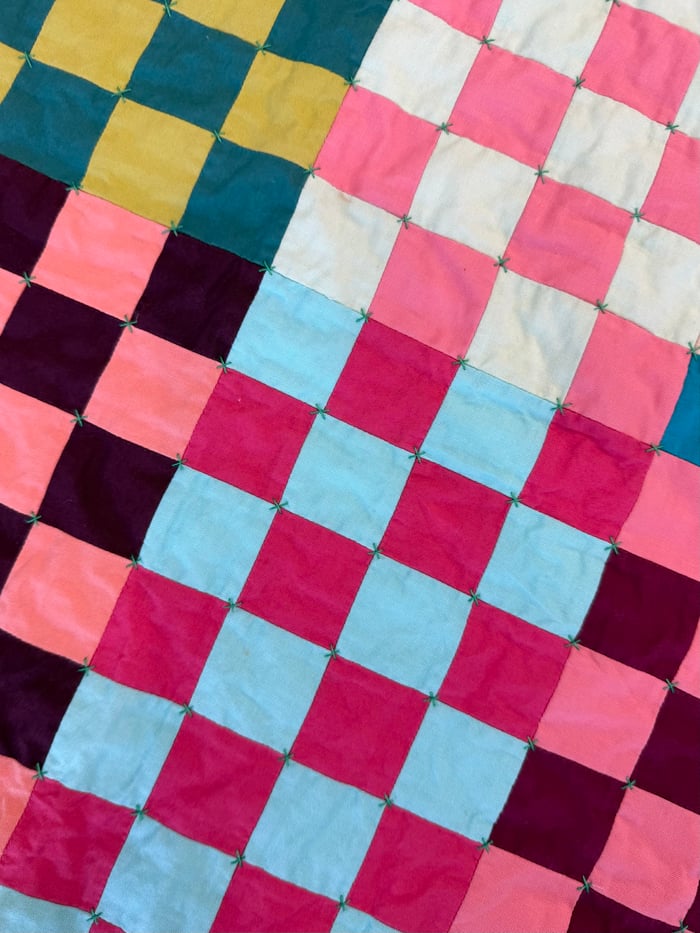
I wanted the front to have these little x's, which is a stitch you often see when hand tying a quilt, but I really didn't want to hand tie this quilt! So, I passed my needle through the layers (in the batting, the middle of the quilt sandwich) and came up in one corner of the x. I made a diagonal stitch and went down through all the layers to the bottom of the quilt, then brought the needle up to the top in another corner of the x. I'd bring the needle down in the last corner of the x, but only into the middle of the quilt, not through to the backing. The needle would pass along to the next corner through the middle of the quilt, and then the next x would start.
For whatever reason, this particular process of hand quilting was extremely enjoyable. It might have been because each x was so cute as it appeared, or maybe because it was a different process than straight line quilting. I am about to start quilting another checkerboard quilt and plan to use the same process.
That's the end of today's inspiration for you! Now go make your life harder - dream up a complicated hand quilting design and just go for it!! I promise it will take longer than you thought and make you question taking advice from me, but in the end it will be worth it and one of your favourite quilts ever!
And if you do this, please send a photo to me (info@piecefabric.co). I'd love to get decorative hand quilting ideas from you!
All the best to you, dear friends!
- Kendra